Wednesday, November 29, 2017

Honk If You Love Flying Geese


Honk if you love Flying Geese. 
I'm not honking right now.  I have several quilts held up because they need some Flying Geese for sashings or borders or block parts.  So a couple of days ago I declared it Flying Geese Day at my house and that's the only thing I allowed myself to work on at the sewing machine. 


I completed some, but not all, Flying Geese for Blind Man's Fancy sashings. 

I completed the Flying Geese part of the border for White Bird. 


I made some fall color/dark corners Flying Geese so I can make more block A for Fall Festival...

...and I made some fall color/light corners so I can make more block B for Fall Festival. 

Enough of that. 

Tuesday, November 28, 2017

Going in Circles


I have finally gotten around to making more improv circles so I can get them in the hoop and embellished...

...like these. 

It's a long term neutral, circular, improv, crazy quilt project.  Just going with the flow.

Monday, November 27, 2017

Bohemian Roosters


These are 20 inch Rising Sun blocks.  I haven't added the corners yet. I just put some fabrics behind the blocks in order to take pics and see how some fabrics look. I'm not sure I have enough boho-ish fabrics to complete 16 blocks so I'm making the circles first and will add the background corners after that.  The fabric in the middle will be fussy cut from  Bohemian Rooster fabric by Susan Winget.  I've had a piece of it for a very long time and didn't know what to do with it. Now I know.  The rays will all be yellow fabrics.  The circle backgrounds will be ???? and hopefully kind of boho-ish or rooster-ish.  I don't usually pull all fabrics for a quilt before I begin it.  

This is another pieced pattern from Kathy Doughty's book Making Quilts. 


Sunday, November 26, 2017

All Creatures Great and Small

All Creatures Great and Small Hexies
November finishes

 I work on hexies off and on when a small project is called for which has been the last couple of weeks.  I haven't felt like getting a quilt basted so I can get it in the hoop for hand quilting. Maybe today is the day. 
And that makes 62.  I guess I'll make them until I run out of creatures great and small. 

Saturday, November 25, 2017

From Brown 3.5 Inch Scraps


From brown 3.5 inch scraps I made a few six inch Bow Tie blocks...

...and some three inch Snowballs (with flippy corners that won't behave nicely for a photo). 

I also cut out the last of my Glitter blocks from 3.5 inch scraps but haven't started sewing on them yet. 


Wednesday, November 22, 2017

The Weekly Pickles


I've finished the last six of the twenty-five Pickles required so I can move forward to the next steps. 

Instead of a weekly Pickle block I might have to blog about a weekly Tobacco Leaf block or a weekly Sunflower block.  Keeping a weekly goal for myself has really helped keep this quilt from becoming a UFO. 


I'm working toward this Pickle Dish quilt. It's not normally what you think of when you think of a Pickle Dish quilt. It's from Kathy Doughty's book Making Quilts.   As you may or may not notice the Pickles are trimmed with 1/4 inch bias tape and then appliqued to the background.  The next step is making the bias tape. I've never done that before but have reviewed several tutorials and am thinking...just thinking...of buying a bias tape maker. First I'm going to try making some without it. 

After looking at several fabrics ( well, actually just two) I have on hand that might yield enough bias I've decided on this orangey-brown.  I think it blends well enough with most of the blocks and with the background fabric. 

Tuesday, November 21, 2017

A FQ, A Lotto Block, Some Orphans, Some Scraps = A Finish!


Donation Quilt
44 x 60


 This is the fat quarter to be used.
I combined it with a 12 inch Bird Block I won several months ago in a Sunshine Online Quilt Guild Block Lotto, some six inch Flower and Rosebud orphan blocks and some ten inch Practical Orchard orphan blocks, some scraps and some bird themed six inch charms I've had left over from various swaps.   Most of the orphan blocks were intended for different swaps but I didn't feel them worthy because they had some imperfections of some type. For instance that purple flower block with the yellow center had a center that was the wrong size. Anyway...they were all very old orphans and I'm glad they are moving out of the house. 

The backing is a double border print from a garage sale. At least I think that's where it came from. I pulled a piece of masking tape off of it that said 2 yds - $1.00.   I had intended to make the quilt 42 inches wide so I could take advantage of the length of it but ended up with a quilt 44 wide so, darn it...I had to use something else. But while digging around I found a piece of sheet cut off from another quilt back that was about the same color so I added that to the width of the quilt and had a backing.   

This is the first time I've tried using the serpentine stitch on my machine. I meant to sew lengthwise instead of width wise but must have spaced out right at the start. But it all worked out okay.  And I'll probably use the serpentine stitch again. 


Monday, November 20, 2017

A Finish! Gwennie Inspired Medallion


Gwennie Inspired Medallion
60 x 69
Hand Quilted

Basking in the glow of the morning sunrise. 


I don't normally make medallion quilts for the same reason I don't normally border quilts - I can never think of what to add for a border. 

In May 2016 Lori of Humble Quilts came up with the idea of a Gwen Marston inspired medallion quilt along. Each person would do their own thing make a center medallion and add rounds each month based on a prompt.  Ok...I joined in thinking that if I had prompts I might be able to make a medallion. 

The center prompt was BASKET.   Good.  I won a bunch of baskets from Block Lotto so I was ready and off to a good start. 

 And then the second prompt was CHILDHOOD.  Yikes!!  
I finally came up with weaving for my childhood prompted round and used some brown fabric that looked like a basket and wove some red, yellow and blue fabrics through it.   I really never liked dolls when I was little but preferred books and crafts.  One of the crafts I have liked through the years has been weaving starting with those potholder looms with loops that make a worthless potholder. I still have one of those looms.  I also still have a small loom that I used to weave belts and a rug (in strips).  I have looms that "knit" stocking caps.  And I've woven several baskets. 

The next prompt was LOG CABIN.  So I made little 3 inch quarter log cabins and used the traditional red fabric for the center - red fabric with baskets on it. 

Next prompt was STAR.  So I made little 3 inch friendship stars  from my 1.5 inch scraps and "wove" them in with red/white rail fence blocks.   I used any color of scraps for the star backgrounds since there were baskets in many colors in the center. 

And then came FISH for a prompt. Fish? Seriously?   I finally ended up with blue and white HST waves and some of the blue fabrics even had fish in them. How's that for using the old gray cells? 

And then I hand quilted it every which way, this way and that way.  (Have you ever seen a lassie go this way and that way?) 

And then I used a red basket weave looking fabric for the back. 

You may or may not know that I have a wringer washer and not some newfangled washer so wash everything pretty much by hand (by choice).   Since I had used a red backing I put the quilt in the washtub with three new color catchers and two old color catchers that hadn't caught any color.  I really haven't ever had much of a problem with bleeding but there's always a first time so I'm always a little cautious and go heavy on color catchers.  Then what to my wandering eyes should appear but red, red, red, red water. RED. REALLY RED.  And the color catchers were RED. REALLY RED.  I pulled that quilt out as fast as could be and threw it into the other wash tub and grabbed the Dawn and followed Vicki Welsh's directions to save a bleeding quilt. 


Then I hung it out on the line in the freezing cold because it had too much water in it to go in the dryer right away.  Quilts don't easily go through the wringer so I just squeeze out as much water as I can.  I would have put it on the drying rack in the basement but it had some sweaters drying on it.   Anyway...I found out how freeze drying works!  After a day on the clothesline in the freezing temps that quilt was stiff as a board.  I let it thaw a little and then put it in the dryer. 

And there you have it.  I made a medallion quilt! 


Sunday, November 19, 2017

I Don't Leader/Ender But I Do Multitask

 Often when I post about Rainbow Scrap Challenge Projects I get comments that the blocks or units I am working on would make a good leader/ender.  Well, it probably would if I were a leader/ender kind of girl. But I'm not. I've tried and tried.  I prefer to say I multitask. When I'm working with scraps I'm normally really working with scraps and I arrange my scraps by size. Then I use the scraps in various projects based on size. So, for instance, this week I will dig into the 3.5 inch scraps and cut them for Snowballs, Bow Ties.   Then I will chain piece both blocks at the same time.  

But then sometimes I multitask by fabric or by color.  For example...I saw a block that involved nine patches on Nann's blog (With Strings Attached).  It's in the top row above.  I have a lot of nine patches and Nann is one of the ladies I have swapped with for years with the Block Swappers Yahoo Group. When I am inspired rather than pin to a Pinterest board or bookmark it a lot of the time I just make a block to see how it goes and to see if I really, really am inspired.   If I'm really, really inspired then I make more at some point and if I'm not the trial block goes into the orphanage. 

So, to see if Nann really did inspire me,  I grabbed a few of the bright 3 inch nine patches since I'm using the darker ones in a Jack's Chain and decided to use some tone on tone fabrics I would have to cut for the borders plus make the corners from 2.5 inch scraps.   

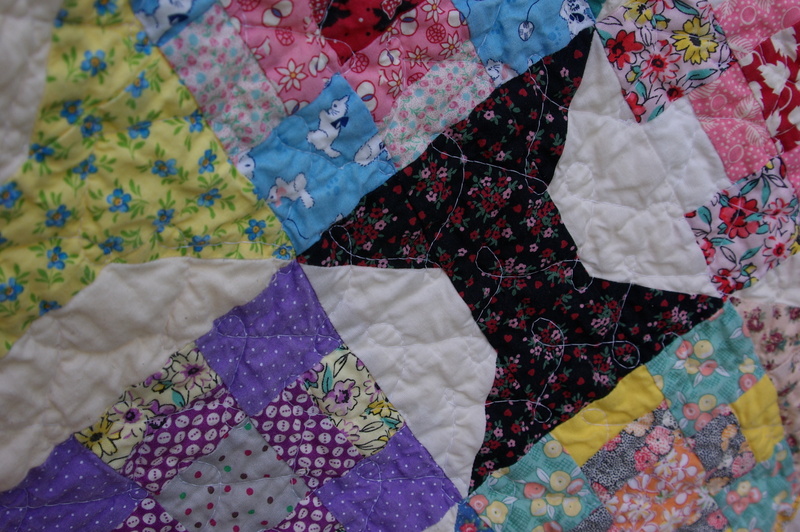
And while I had the tone on tones out to cut I decided to use the same fabrics on two other UFOs - Happy Blocks with 4 inch centers and 1-3/4 inch sides and 10 inch Owl and Pussy Cat Sawtooth Star blocks which requires a 3 inch tone on tone piece. 

So, as I pulled each fabric then I cut a 1-3/4 inch strip for Happy Blocks, a 2.5 inch strip for bordered nine patches ( or sometimes a 3.5 inch strip depending upon yardage) and a 3 inch strip which I then further cut into the pieces necessary for each block. 

Then I chain pieced them all at one time - multitasking.  Then I started over again with a different fabric and so on until I got tired of making these blocks. 

And three projects moved forward in no time. 
This is the new start that I saw on Nann's blog. These blocks will then get sashed with some kind of stripe (maybe or maybe something else to be determined) and corner stones and set on point. 

 I think I will have a wilder version than Nann is making. 
But we are both having fun, I'll bet. 


A few years ago I participated in an I Spy Happy Block swap. The blocks have four inch centers and 1 - 3/4 inch sides to total a six inch block.   Over the years I have participated in 4 inch novelty charm swaps too. So, from all the swaps I pulled the ones with critters on them and into Happy Blocks they go. 


I have a bigger pile of them now but to make a BIG quilt you need a BIG pile. 

Strange Bedfellows will be a quilt for me. The rest of the charms/blocks will go into donation quilts. 


And these are the new additions for the Owl and the Pussy Cat quilt. The centers are owl and pussy cat scraps. 

And now I've also made a few tone on tone scraps of various sizes that I will add to their respective scrap boxes. I don't have many 1-3/4 inch scraps to add to so depending upon the size of scrap I further cut those into 1.5 inch postage stamps or a 1.5 inch strip. 


Saturday, November 18, 2017

Using 2.5 Inch Scraps and Then Some


I used up some 2.5 inch scraps this week and made three 10 inch Crazy Ladies of the Lake blocks. 
I use scrap chunks to make the centers. 

I'm aiming for a large quilt  with no sashing so this Rainbow Scrap Challenge project will continue into next year. 

I also made a brown 8 inch Depression Block from 2.5 inch scraps.  And I finally finished the yellow one I found in pieces in with the finished blocks.  I've been making these for years but still don't have enough for a BIG quilt so this, too, will continue into next year as a RSC project. 

Speaking of Rainbow Scrap Challenge...you can find an array of Rainbows each ScrapHappy Saturday.  And who doesn't need a rainbow each week? 

Friday, November 17, 2017

Moocher Invasion


I need some brown scraps in order to move forward on my Plain Brown Wrapper quilt so I decided to make some Brown Cows not to be confused with Black Cows which is one of my favorite summer drinks. 

I put them out to pasture and they clearly think the grass is greener on the other side. 


(Live and learn: these would probably be a lot easier to make if you print the instructions in color instead of black and white. I'm stingy with my colored ink. It would also be a lot easier to make one, not five,  first to see how they go together. It's easy to forget which fabrics go with which block if you cut all pieces for all cows all at one time.) 

Wednesday, November 15, 2017

A Tale of Birds in the Air - Chapter V - Winging It


A few months ago I started a new Birds in the Air block using my pansy fabrics.  Then I felt a little guilty about that because I already had two different Birds in the Air UFOs.  So I decided to move both UFOs forward and then reward myself with some new start blocks. 

Old Birds (above) is now a top. Or I thought it was. My inspiration came from a quilt in a magazine that was inspired by a vintage quilt. And so this came out at 71 inches square. That's not a very useful size so I'm thinking I'll add a hand-dyed 2 inch border and then a navy 4 inch border - nothing fancy but that will take it up to 83 inches square and although I'm not really fond of square quilts I can live with it and find it more useful than a 71 inch square quilt.  Problem is that I don't think I have enough navy fabric but I haven't really looked. I guess I'll need close to a yard. 


White Bird is also a top now waiting for borders.  This will get a flying geese border. 


While my sewing machine was out for repair I cut a lot of pieces for the Flying Geese and now that I have my machine back I sewed up enough of them for the top border. 


And I now have four more Birds in the Air from pansy themed fabrics to add to the pile for this third quilt.  I don't have a name for it yet but I'm leaning toward something without bird in the title like Thoughts or Remembrance since that is the flower meaning for pansies. Evidently "pansy" comes from the french word "pensee". 


Tuesday, November 14, 2017

The Weekly Pickles

Pickles

I don't have too many more to go. 

These are pieced pickles not foundation pieced pickles. 

I'm trying to balance time spent on old UFOs vs new starts. 

This was a new start several months ago. 

Sunday, November 12, 2017

A Finish! Churns and Spools

Chunky Churns and Spools
30s reproductions meet calicoes
68 x 86
Machine quilted on my DSM


I can mark two UFOs off the list with this one.  I combined blocks from a calico on muslin Spool swap in 2010 and a Chunky Churn swap in 30s reproductions and a solid from 2015. 

There's no design wall here. It's usually my practice to randomly sew blocks together. That's what I did this time but of course alternated a spool and a churn.  I think if I did have a design wall I would spend too much time arranging and rearranging and rearranging and rearranging and never be satisfied.  How do I know?  That has happened when I have tried to lay out blocks on the floor.  Anyway...I'm usually satisfied with my random method and I've managed to skip the step that gives me grief. 

I usually don't add borders because I never know what kind of border to add. Plus I like piecing blocks so piece and piece until I have enough for a nice sized top which means I'm ready to sew a quilt top together. At that point I don't want to make a different block for a border. And I rarely buy large pieces of yardage to have enough on hand for a non-pieced border of fabric(s) and so I usually make quilts without borders.   

HOWEVER this time I did not want to make more Churns or Spools to make the quilt a little larger  so I decided to challenge myself to add a border.  I decided to try an easy zig zag or rick racky looking border.    And all went okay on the first corner BUT...

 ... only too late did I find out at the second corner that those rick racky ends did not meet up so nicely no matter how hard I tried. Maybe if I had laid out the border on the floor ahead of time I would have seen the problem but I didn't so I had to improvise what to do on opposite corners. It doesn't affect the warmth the quilt will bring someone so I'm all right with that. 
 I didn't take a picture of the backing because it was cold outside yesterday when I took these pics but it is a plain white 100% old muslin sheet that I found new in the package at the thrift store with a J.C. Penney logo on the front.   With the quilting I did the back looks like a mattress pad.   

You can kind of see the quilting on that black calico spool - a pattern of up and down loops using each 2 inch square as a guide (most of the time).  This was the first time I tried this. I found it pretty easy to do on these blocks laid out on a grid and may try it again.  This time I got a little confused every once in awhile when I hit the blank space on the spools. 

I participated in four different Chunky Churn Dash swaps with different themes - patriotic, 30s, fall, spring.  I decided to challenge myself with different alternate block layouts for each theme.  So far I finished the patriotic themed one - a Quilt of Valor for my brother-in-law and this one. 


This will go into the twin sized donation quilt pile. 

Saturday, November 11, 2017

Whatchamacallits

 This is day 10 of my sewing machine in the shop.  I have been cutting, cutting, cutting and doing hand work instead.  I finally got out my old Kenny Kenmore (nice plain guy who has been around since the 70s) and did some sewing to ease those sewing withdrawal pains I've been experiencing.  I used to make all of our clothes with Kenny. I'm not sure why I quit using him and thought I needed anything else. 

Anyway...I made 3 brown Whatchamacallit (21 patch) blocks from my 1.5 inch scraps.  Scraps are cut 1.5 x 2.5 and then sewn together with a neutral 1.5 x 2.5 scrap for a little block that measures 2.5 square.  Twenty one of those little squares are sewn into blocks of 3 x 7.  Finished size of the block is 6 x 14.    


And here's how they will look together with other colors someday in a big quilt. 

This will continue into 2018.  Instead of using 1.5 scraps next year I think I'll cut a 1.5 piece off the end of  2.5 inch scraps for variety.