Showing posts with label scrap chunks. Show all posts

Tuesday, March 3, 2026

Winter QOV Quilt Along Part II


I usually make a scrappy version of Alycia's Mystery Quilts and Quilt Alongs. 
I was thinking I would not participate this year because my patriotic prints are down to very small bits and pieces. However, I was looking around at some of my other options and now I think I have decided to actually make two quilts. 

I gathered together some red, white and blue civil war reproduction and similar fabric scrap chunks for quilt number 1 and...


...for quilt number 2 I gathered together some shirtings, plaids and homespuns. 

This week we made six 8 inch (finished) red Sawtooth Stars on white. 


If you want to join in on the conversation and photos of others working along - join us at :


Monday, February 23, 2026

Winter QOV Quilt Along Part I


I usually make a scrappy version of Alycia's Mystery Quilts and Quilt Alongs. 
I was thinking I would not participate this year because my patriotic prints are down to very small bits and pieces. However, I was looking around at some of my other options and now I think I have decided to actually make two quilts. 

I gathered together some red, white and blue civil war reproduction scrap chunks for quilt number 1 and...

...for quilt number 2 I gathered together some shirtings, plaids and homespuns. 

This week we made six 8 inch (finished) blue Sawtooth Stars on white. 


If you want to join in on the conversation and photos of others working along - join us at :


Tuesday, November 11, 2025

It's A Top! Orphan Heidi


It's a top!
Orphan Heidi
40 x 60

I had a difficult time taking a photo yesterday because it was so cold and windy. This is another orphan quilt. One orphan block is mine and the rest came from other folks. For this quilt I chose fifteen 8 and 8.5 inch unfinished blocks. I framed them in different blue scraps so they finished at 12 inches. Then I made a column quilt with a blue multicolor fabric washing between the rows. 

And sew on...


Tuesday, November 23, 2021

Nine Patch November: Path and Stiles

I just returned home yesterday afternoon from a short trip to a state park. Five of my husband's seven siblings and spouses rented a cabin rented a cabin in the woods and a good time was had by all although I think some folks (mostly women but not me) were disappointed that internet connectivity was almost nil and they became rather anxious. I think it's nice to get away for a bit but I am always glad to be back home. Groups of people make me anxious and I'm not much of a socializer. 

Today I finished up the rest of my Path and Stiles blocks. I now have 100 of these nine inch finished blocks. 

It's Nine Patch November at my house. I chose to try to reduce both my inventory of six and three inch Nine Patches. I swapped three inch Nine Patches quarterly for a number of years and although I've made a lot of quits that use them I still have a bin of them. I used some of those Nine Patches as the centers of these blocks. 

I went through my chunk scraps and tried to match up my scraps to the Nine Patch centers. I actually had a lot of fun doing that. 

Now my three inch Nine Patch inventory is 100 Nine Patches lighter. 


After I finishing ironing the remainder of the blocks they will all go into the Some Assembly Required box where complete blocks sets rest until I feel like assembling a top. 

Now I have a little stack of 3.5 inch width pieces to deal with and my Shoe Box project box will be ready for another project. 


Tuesday, December 8, 2020

Blues Busters


 And just like that I now have 120 Economy Blocks ready to be assembled into a top.  This started as a project to use some little nine patches that have been around for awhile and to use lots of blue scrap chunks. It was fun to just grab and sew - no mixing and matching, no wondering if this will go with that. 

I started with 3.5 inch (unfinished) nine patches for the centers. Then I cut two three inch squares on the diagonal for the first round. Then I cut two four inch squares on the diagonal for the second round. 

I have to say this was definitely a scrap buster. I now have some smaller blue scraps left over to deal with. But in an attempt to use scraps as I go I did cut 3 inch and 4 inch squares from some of the leftovers and I sewed together pieces less than a 3 or 4 inch square into strips for a Chinese Coins quilt I see in my future. Half way into the process of making these blocks I decided to pull the darker blue TOT (tone on tone) scraps for another project. More on that later. 


Saturday, August 8, 2020

Purple Haze

The Rainbow Scrap Challenge color of the month is PURPLE. 
I started my work with the 2 inch width scrap bin.  I didn't have many purple scraps in there so I cut a 2 inch strip for my Single Wedding Ring blocks from purple scrap chunks.  The blocks finish at 7.5 inches. 
 But these Sixteen Patch blocks all came from the 2 inch scrap bin that I am trying to empty. I think these blocks have been a RSC project for a couple of years so I'm hoping to have 120 of them by year end.  I believe I only have 41 more blocks to go. 

Purple haze, all in my brain
Lately things don't seem the same...

Saturday, July 4, 2020

Into The Wild Blue Yonder


The Rainbow Scrap Challenge (RSC) color for July is dark blue. I think we previously used bright and light blues in April. 

Baskets of Flowers
These finish at 9 inches.

I started them last month because I want to use a pile of scrap chunks. I cut a 3.5 inch piece for the HST and a 2 inch strip for the other three basket pieces. I could have used just a 3.5 inch piece to make the baskets but I'm making another block that uses 3.5 and 2 inch pieces so nothing will get wasted and nothing will be left over. 

I'll make the baskets out of the RSC color of the month and use scraps from the 2 inch width bin for the "flowers".  I found a teeny tiny picture of these baskets in a Google search for "flower basket quilt block" but I was warned by my antivirus program not to click any further.  Unable to find any more information about the block I figured out how to make it myself. I'll set these on point and I'm aiming for a  twin sized quilt. 

I'm using some neutral scraps for the backgrounds.  I didn't have enough of the polka dot for three blocks so substituted a few bees. During the block assembly process I grabbed a few of the wrong pieces so some of the backgrounds are a little mixed up within some blocks. I think that will be okay since the backgrounds are scrappy anyway plus I don't really like to rip. 

Hey, wait a minute! Something is wrong with this picture. I thought I made seven blocks. 
(I later found it mixed in with another WIP of partially completed blocks. So this one gets its own photo.)

Then with some of those same 3.5 and 2 inch scraps I used to make baskets I made some Buckeye Beauties that finish at six inches.  I started these last month too. 


I started those Buckeye Beauties because they will use some of the same 3.5 and 2.5 inch scraps as the baskets and I'll also use some shirt pieces as well as some red and black chunks.  I had three bags (yes, sir, yes, sir, three bags full) like the one shown here full of shirt scraps left over from making a couple of other quilts. I've been going through those scraps and I've been cutting squares or 1.5 inch strips or 2.5 x 3.5 pieces for some other quilts. Two bags down and one to go!! 

I also made a few dark cornered Wishing Rings. I have been making these for a couple of years. They finish at 3.5 inches. I want 312 of these blocks with dark corners and 312 with light corners and have over 200 of each so I'm hoping this is the year I make my goal.   I have been cutting the center and four corners from 3.5 inch scraps. I cut a 2 inch piece and two 1.5 inch pieces. Then I cut 1.5 inches off of the 2 inch piece and square it up. The 2 inch piece is the center of the Wishing Ring and the 1.5 square goes into the postage stamp scrap box. Then I cut the two 1.5 inch pieces into four 1.5 inch squares for the four corners. I then have very little waste from a 3.5 inch scrap.   The sides of the Wishing Rings are cut from 1.5 inch scraps. 

So, as you can see I got three different blocks from each 3.5 scrap and two of those blocks used the 2 inch scrap. 

Then this is what happened to the rest of the original 3.5 inch scrap. I have some HSTs for the Parts Dept. because when I cut my HST for the basket I used an Easy Angle Ruler and cut two HST parts rather than leave a slanted cut on my scrap.  I then cut off a 2.5 x 3.5 piece to go into a bag of pieces that size I'm saving for a quilt. I am aiming for 800-2.5 x 3.5 pieces and as of today I have 400.  Then I cut the rest of the scrap into 3.5 inch squares for who knows what.  I'm just trying to turn almost all my scraps into squares now.  And if there was not enough for a square it was sewn into a strip. I have a box of those strips in various widths and colors now and at year end I'll make a Chinese Coins quilt. 


Thursday, June 25, 2020

Clowder Puff


Clowder Puff
44 x 58

I started making the cat blocks in December 2018 as a Rainbow Scrap Challenge project. I used a cat pattern I saw online but that link is now broken.  The blocks finish at 5 x 9. 
I used scrap chunks in the Rainbow Scrap Challenge (RSC) color of the month and also used a variety of gray scraps for the backgrounds. 
I thought it would make a nice donation quilt. 
The backing is also gray with colorful triangles. The quilt is a weird width so I had to piece it and I had almost but not quite enough backing fabric. So I added in a small piece of solid gray.  I used a gray with black flowers for the binding. 

I quilted some really big free motion flowers. 


Saturday, June 20, 2020

Still in the Pink

Pink is still the Rainbow Scrap Challenge color of the month and I'm still using up some pink scraps. This week I made Wishing Rings that finish at 3.5 inches. Wishing Rings with dark and light corners will alternate in the finished quilt.  This is my second year of making them so I hope by year end I have enough of them for a nice big quilt. 
This is also year two for Double X Mosaic and Snowballs that are inspired by a vintage quilt.  These blocks finish at 4 inches and I also hope to have enough for a nice big quilt by year end. 


(These may look a little crooked. I didn't iron these because I won't know which way to iron the seams until I start sewing blocks together.)

I was showing symptoms of PSP20 awhile ago but I didn't think I had many solids I could use. I rooted around and found some solid scraps and don't you know shortly after that I tested positive for PSP20. 

I used the solids in the RSC colors that have already been called and keep a little pile near the sewing machine to sew together in between other blocks.  I had the print postage stamps already cut. And now I'm in the process of completely clearing out my 1.5 inch width of scraps bin. 

Then since my scraps keep getting smaller and smaller I started another new postage stamp block - Double Irish Chain. For this one I will use light brown backgrounds and dark browns for the center of the chain in between postage stamps in the color of the month.  I found a chart that came in handy when I was planning my blocks so I didn't have to think much.  I did use strips instead of squares for the light brown sections. 


And then another new project started is a six inch finished Buckeye Beauty block. I have a bunch of shirt scraps to use up so I'll be making these from shirt scraps and scraps in the RSC color of the month. 


I was inspired by this vintage quilt. I saved a photo in my "vintage inspiration" folder but didn't bookmark where I found it. 

Edited after original post:
Inspiration quilt is not vintage. 
A kind blog reader pointed out that the quilt can be found at one of my fav blogs Fret Not Yourself.  Thank you, kind blog reader, for letting me know Ann was my inspiration.  I searched and searched but I think I always had "vintage" as part of my search string. 


The rest of the pinks are in the flower garden so if you don't want to take a hike through some pink flowers the deer have left me then you may quietly leave now. 

This is not too spectacular. It is Silene or Catchfly. It is low growing so I have it near a path. It is called Catchfly because it has sticky stems that supposedly trap flies or other insects.  I don't look closely enough to see if that is true. 

I started a bunch of different colors of Yarrow (or Achillea) several years ago from seed.  Before our pasture turned into a wooded area I used to find white ones growing wild. I like to use these as cut flowers but have also dried them and used them when I've made dried flower wreaths.  I have several patches of these in the flower garden. 
I love that the big flower head consists of lots of little flowers. 

Look what I found before the deer found them!! This rose bush needed some weeding and had some wild Trumpet Vine and Dutchman's Pipe growing up through it and had some spent Iris clumps in front and a clump of Alliums around it so maybe the deer didn't notice I had a rose bush there. 
The Pinks are still blooming in the fairy garden as well as miniature Lilies and Scabiosa or Pincushion flower.  Hmmmm...purple, pink, red, yellow color scheme for a quilt???

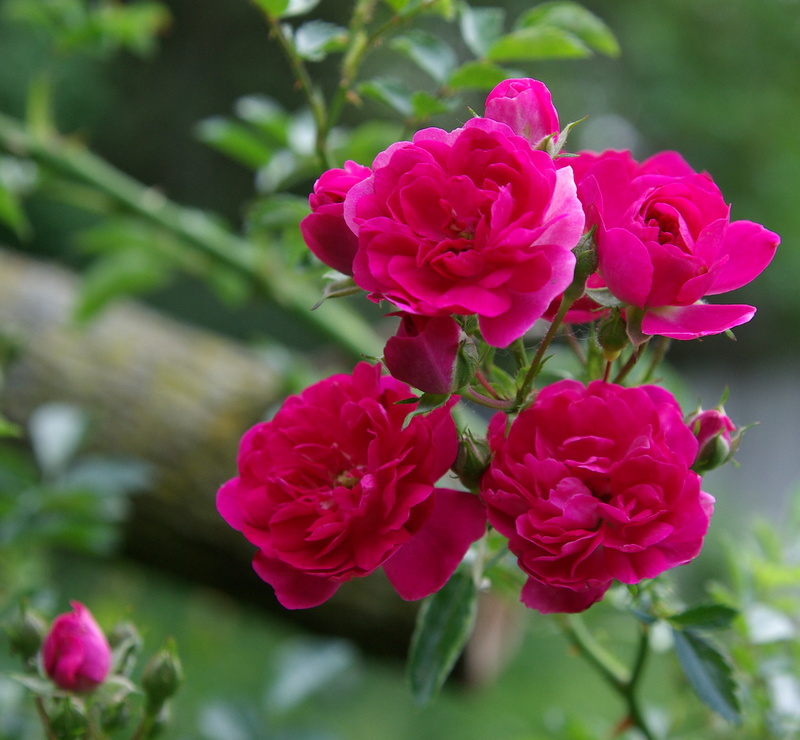
Seven Sisters roses. The Deer must not like these roses or the Irish Spring soap shavings I sprinkled around the base of the trellis may have kept them away.  This bush is a bit unruly but I have it contained to a small heart shaped trellis in the fairy garden.  I've had it for a long time. I received a cutting from my husband's Aunt Essie and I think she said she had received her cutting from her mother, my husband's grandmother.   I really need to take more cuttings because this would make a beautiful rambling rose hedge.  I believe it is called Seven Sisters because it supposedly grows in clusters of seven flowers but I usually have more than that. 

Most of my Echinacea (or Coneflowers) that I started from seeds are purple but this scraggly looking one is pink.  This is the first year for this one. My husband surprised me with it as well as a white one.  The Goldfinch love my Coneflowers and I've seen them sit on the dried flower heads and pull out the seeds to eat. It's quite a site but they never stay long enough for me to get a picture. 
I started Saponaria or Soapwort from seed over 30 years ago and now it is very invasive and I'm constantly pulling it out of some of the places it gets into. But my flower gardens are more cottage style and informal so I do let patches of it grow here and there to keep down weeds.  It is called Soapwort because flowers, leaves and roots can be used to make a gentle soap or shampoo. I've actually made the soap several times. When the kids and grandkids were younger I thought it would be a fun plant for experiments. It's nice to know that if soap becomes scarce I have some in my flower garden. 
Pink Clematis


The Daylilies are starting to bloom and the first bloom is pink!  The deer and rabbits munch the daylily shoots to the ground when they first start poking up in the Spring but the Daylilies never seem to mind. Hopefully the critters will leave the buds alone. 


Saturday, June 13, 2020

Pinks


This week I dug into the 2 inch scrap bin and found I didn't have many pink scraps in there so cut some 2 inch strips from my scrap chunks to make my Single Wedding Ring blocks that finish at 7.5 inches. Yes, I see that ooopsie too. 

Speaking of wedding rings...my husband and I celebrated 47 years of marriage on June 7. Well, we didn't really celebrate since neither of us ever knows what date it is any more let alone what day it is but I noticed the date on the computer when the 7th had passed by.  Forty-seven years seems like such a long time but wasn't it only yesterday we were married and I was a young girl? 
I also made four Sixteen Patch blocks for my collection. They are made from 2 inch scraps and finish at 6 inches. I've been making them for several years when I have the scraps and I'm aiming for a total of 130 blocks. 

Speaking of pinks...here are some of my Pinks (or Dianthus) in bloom in the fairy garden. I started these from seeds about three years ago and planted them in a ring around the fairy garden which is in a circle and has lots of low growing or alpine plants in it as well as a fairy door in the base of a sundial.  Every once in awhile I may even see a fairy or two. The Pinks are a perennial variety and have a sweet scent. They are evidently called Pinks because the flowers have frilly edges that look like they were cut with pinking sheers (if you have an imagination).